Making a Fabric Poster
Fabric posters are great. You don’t need a clumsy poster tube, just fold it up and put it in your suitcase.
We use Spoonflower for ours, and there are even instructions. But there are a few details that take some extra work to get right; I hope that this will guide you through them.
I have also made a video of the process, which you can view on YouTube.
The very short version, so you have an idea of where we’re going:
- Create a high-resolution (150dpi) image of the poster
- Order it printed on Performance Knit fabric from Spoonflower
- Trim the poster to size
Required Software
In order to make this work, you need two pieces of software:
- A poster design program; many people use PowerPoint, I often use Publisher. Scribus or LibreOffice should work if you want an open-source solution.
- The Gimp to convert to an image and make final adjustments.
Publisher or Scribus may be able to directly export an image of sufficiently high quality, but PowerPoint cannot.
Preparing the Poster
In order for the poster to come out well, the source needs to be good quality. The most important thing is to use good images:
- Use vector images if practical. R can export EMF with devEMF, which is the most reliable vector format to use with PowerPoint.
- Generate high-resolution images. I usually render at 600 or 1200DPI to be safe.
- Copying and pasting charts from Excel into PowerPoint should be fine.
Also, design your poster at the size you want to print it. That is, make a PowerPoint slide 40x32 inches if you want a 40x32 poster.
The poster will need to be trimmed, and trimming is not perfect, so take that into account in your design. It needs to have a full rectangle. This can either be the background, or a rectangle drawn around the poster; something to use as a guide point for trimming.
Leave at least 1/2” between any images and the crop rectangle. Any color blocks intended to go to the edge of the poster should go all the way to the crop rectangle.
Export to PDF
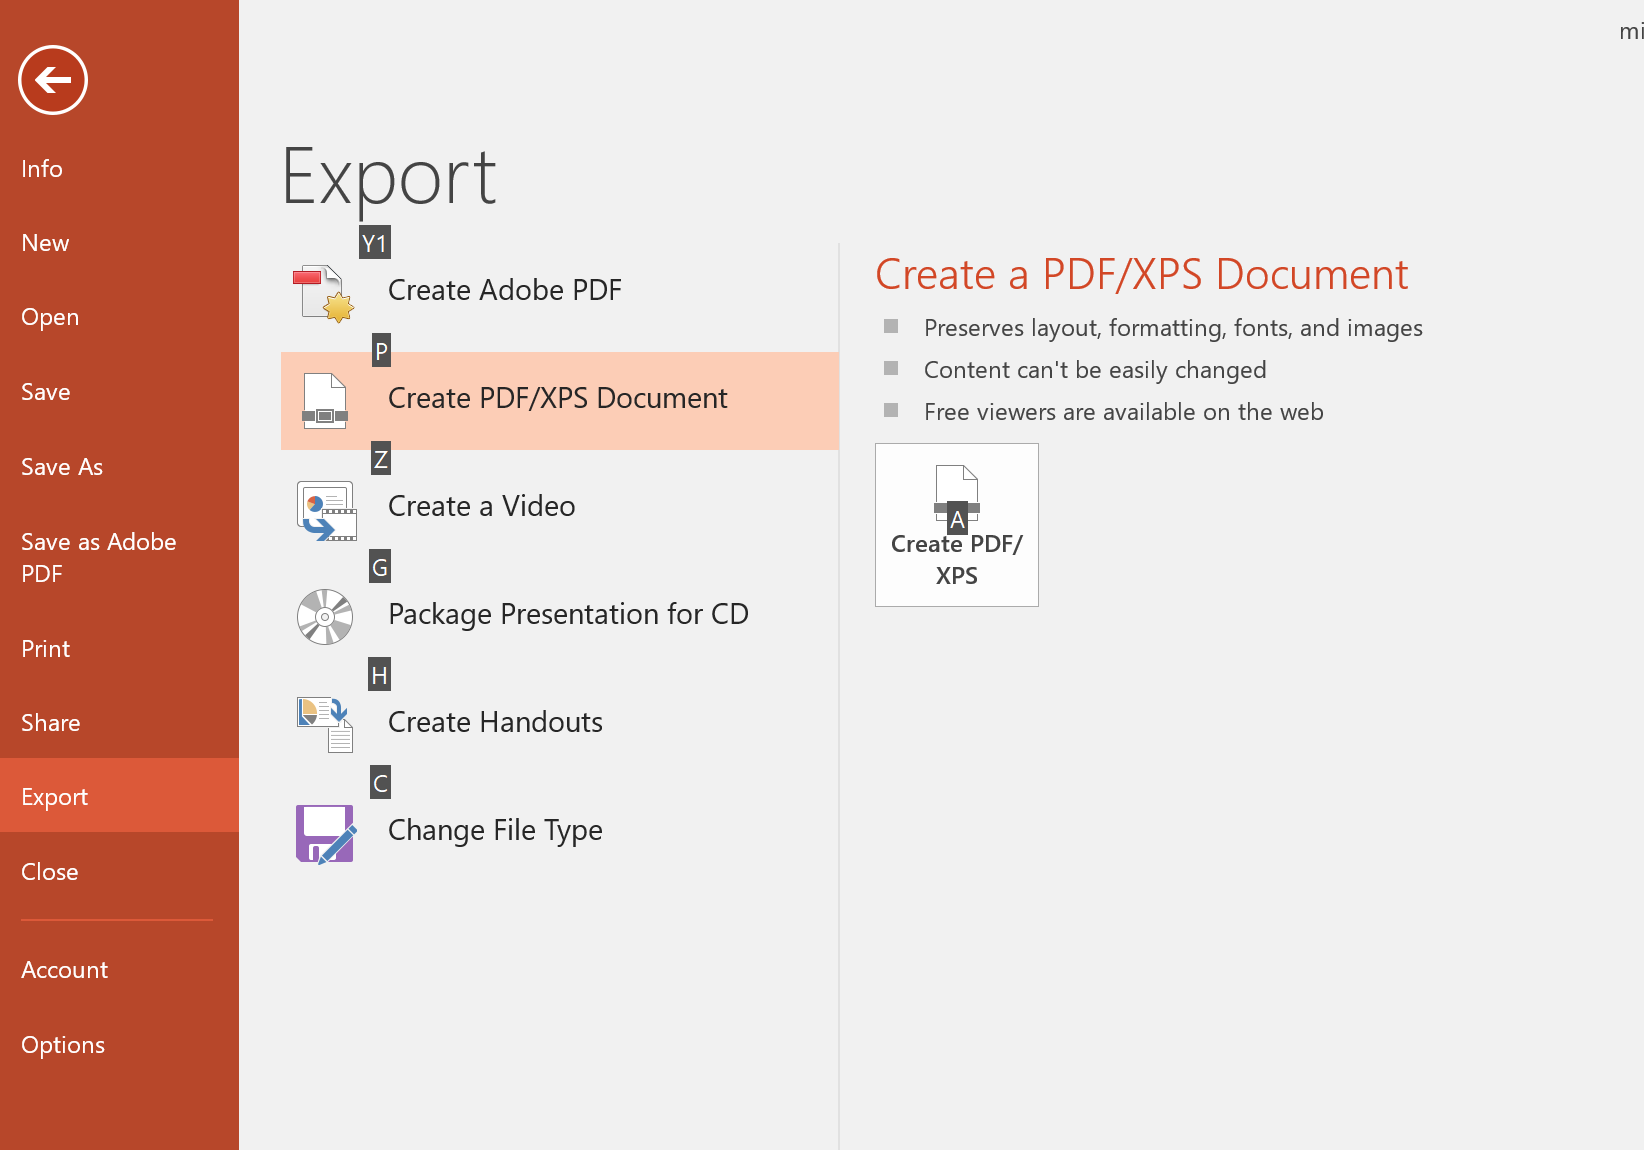

Export your poster to a PDF file. While PowerPoint supports PNG export of slides, it cannot export them at sufficiently high resolution.
Turn off PDF/A compatibility using PowerPoint’s PDF export feature. It can mess up the colors.
Double-check your PDF — look the document properties in your PDF viewer and make sure that the document is the size you want your poster to be.
Convert PDF to Image
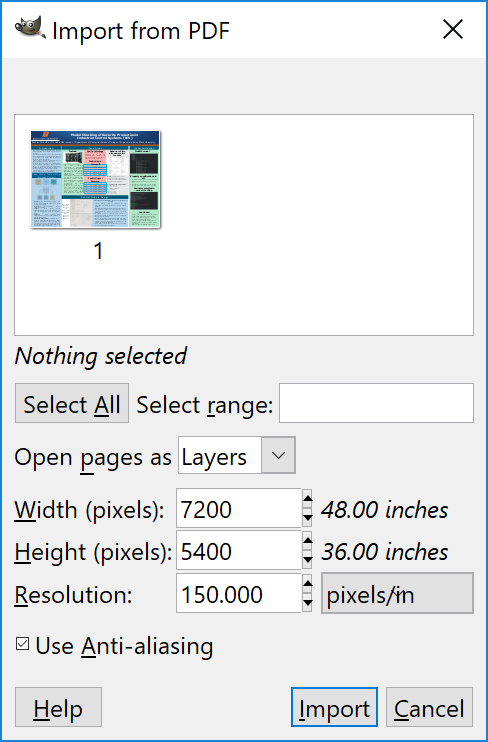
Open The Gimp, and go to File → Open. Browse to your PDF file, and import it. The crucial thing is to set the Resolution to 150.
Then save the image as a PNG file with File → Save As. This file should be big — a 40x32 poster will be 6000x4800 pixels.
If your poster is in portrait orientation, rotate it 90 degrees to be wider than tall.
Upload to Spoonflower
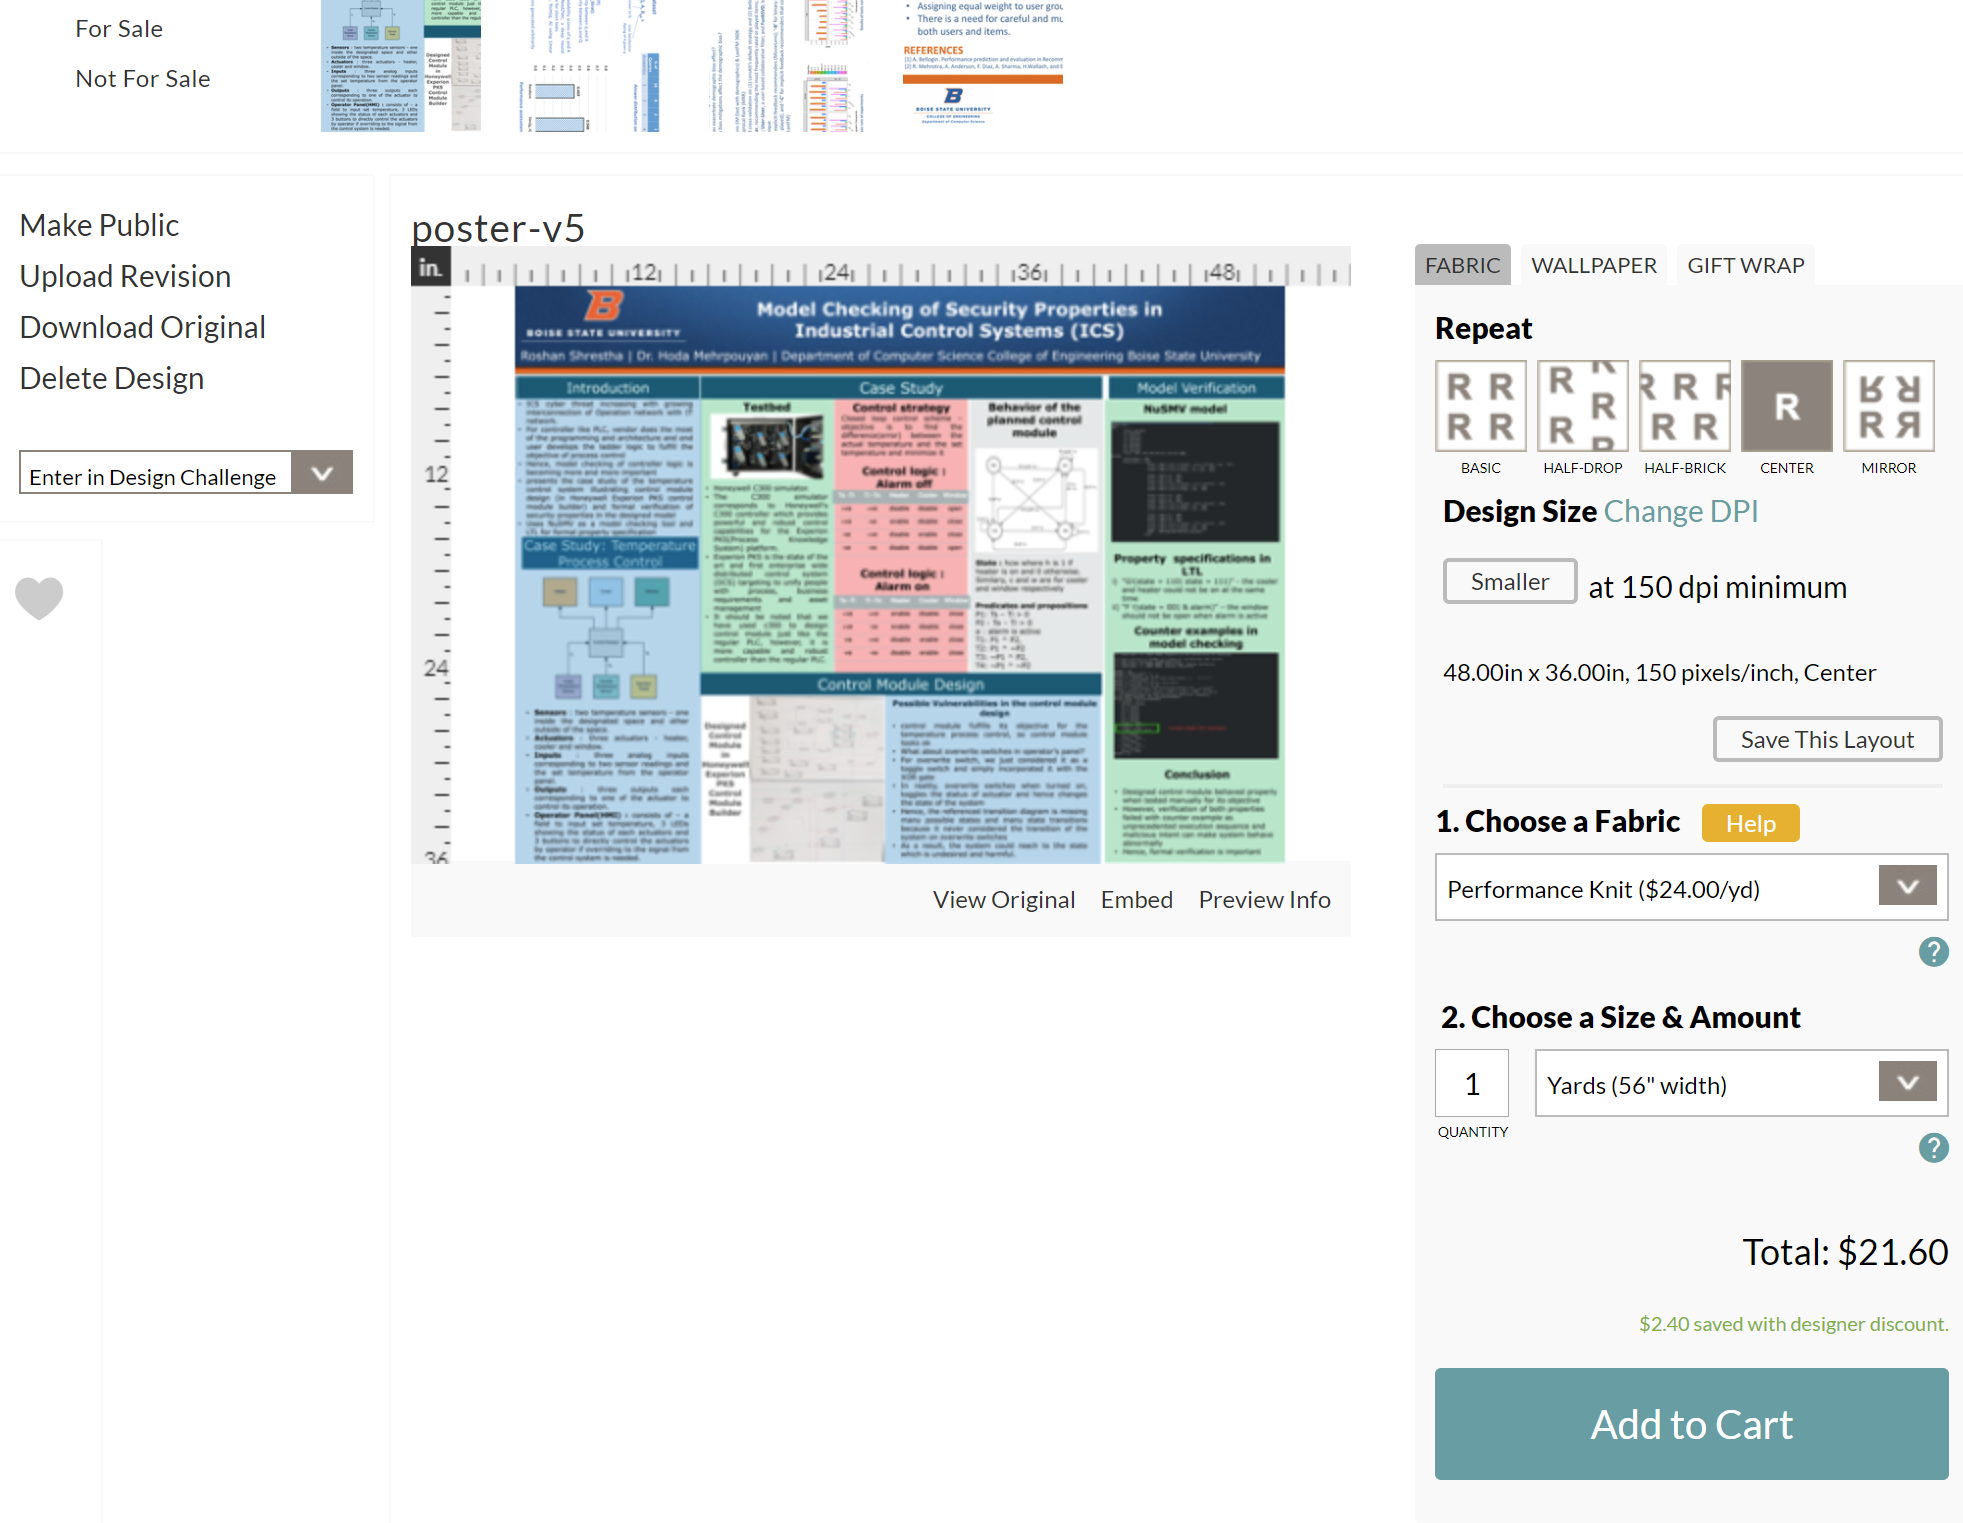
On Spoonflower, create a new design by going to Design → Upload.
Select ‘Performance Knit’ fabric, and ‘Center’ the image (under the Repeat options). It should confirm that it is at 150DPI, and your poster should look lined up properly.
Order!
Trimming
When it arrives, trim it. This is best done with a rotary cutter. We’ll be making a video about that soon.